Sunday, June 30, 2019

Movies that have inspired me: Wild (2014)


Hello all you happy people. I am back after a long hiatus and it feels great to be writing again. As the title suggests, I am starting a new series where I talk about movies that have made an impact on me. I am starting off with one of my favourite movies of all time, Wild. It stars Reese Witherspoon and is based on Cheryl Strayed’s memoir of the same name. It is the story of a recently divorced Cheryl who hikes the Pacific Crest Trail (PCT) for 94 days, all by herself. It is about her journey, her struggle before and on the PCT.  It essentially is the story about healing and rediscovering yourself.
The movie begins with Cheryl starting her hike from Mojave dessert. On the first day, she struggles with everything, right from her bag to the tent, to cooking a meal (she brings wrong fuel for the stove), to sleeping at night. For 8 days, she continues walking, but she is constantly thinking, “Should I stay (on the PCT) or should I go?” On day 8, she meets a construction worker who takes her home, helps her in getting the fuel for her stove and his wife serves her warm meal, which Cheryl hasn’t had since 8 days. On day 14, she meets other hikers at a camp called Kennedy Meadows. There a person named Ed helps her in decreasing the weight of her backpack, by throwing out stuff she doesn’t need. He also helps her with the shoes, which were a size smaller for her. After that, she walks through the snow for days, lost for direction. She still continues her trail, getting bruises here and there, losing her shoes, walking with floaters duct taped to her feet. On day 49, she finally gets new shoes. On day 58, she runs out of water, meets creepy hikers near a water body and runs away scared. On day 62, she reaches Oregon, there on the sea shore, she finally lets go of her feelings for her ex-husband. She writes to him saying, “Dear Paul, I woke up this morning and wrote your name on sand. I have done that on every beach I’ve been to ever since I met you. But I am not going to do it again. I am ready to move on.” She continues her journey meeting fellow hikers along the way who name her “The queen of PCT”. On day 80, she meets a child named Kyle and his grandmother. Kyle tells her that she is staying with his grandmother because his parents have problems, to which Cheryl replies, “Everybody has problems. But problems don’t stay problems, they turn into something else.” After this meeting, she finally breaks down missing her dead mother. On her final day, she reaches the ‘Bridge of gods’, feeling satisfied, thanking the trail for everything it had taught her and everything she couldn’t yet know.


In the flashbacks it is revealed that Cheryl had an abusive father, who her mother later leaves. Her mother, Bobbi raises Cheryl and her brother single-handedly, she takes classes in the morning and works in the evening. Bobbi is really the love of Cheryl’s life. She is happy, loves her children unconditionally and is full of life. There is a scene where she says, “We have nothing, but we are rich in love”. Bobbi is diagnosed with cancer and dies at the age of 45. And after that Cheryl goes into depression. She then cheats on her husband several times, does drugs and gets pregnant with some random guy that she sleeps with. While she goes to a store to buy the pregnancy test, she comes across a guide to PCT and it stays in her mind. She gets an abortion, breaks down before her friend and says, “I don’t know when I became such a piece of shit. I was strong, responsible. I wanted things in life. I was good you know. I ruined my marriage and now I am ruining the rest of my life. I gotta walk myself back to the woman my mother thought I was.” And that’s when she decides to go on the PCT.

Cheryl’s journey is so inspiring for me and quiet relatable too. I had a tough time growing up and I have been on my own, emotionally since I was very young, I mean yes I had my parents, family and friends, but I am a loner and an introvert. Last few years have been extremely tough for me. I lost jobs, I was failing at every single step that I took, all my decisions were turning out to be wrong, I didn’t feel like I was enough, insecurities crept in and my mental health suffered. Everyone around me was moving ahead and I was stuck at this dark place, carrying a burden of being a loser and a disaster at life. I had lost myself, trying to find a purpose and I didn’t know where I was going. I still am trying to figure out my best self, still trying to heal my heart but I know this for sure that I love my life too deeply to quit midway. I don’t know what life has in store for me, but I will continue fighting for everything I want, till the very end. Cheryl’s story restored my belief in the fact that if you keep going, despite of all the obstacles, you eventually get there, and it’s all beautiful in the end. There is this one particular portion of Cheryl’s monologue at the end that has stayed with me and I want you all to take away from this article. It goes, “After I lost myself in the wilderness of my grief, I found my way out of the woods. I didn’t even know where I was going until I got there”.


If you have any movies that have made a powerful impact on you, let me know in the comments below. I would love to hear your stories. I take your leave here. Have a great week and I will see you all very soon.

Sunday, January 14, 2018

At-Home Hair Spa with Hair Pack for Thinning Hair

          Hello beauties. How are you all? I hope you are having a great 2018 and hope you continue that. This is my first post of this year and I am sharing with you all my at-home hair spa routine. It has been a bad phase for my curls since the winter started and my hair has thinned a lot. I have been following this routine for past month and it definitely has reduced the hair fall and made my hair much softer. I have also put together a hair pack, which by itself is absolutely amazing. You can use it on its own and trust me your hair will love you. So, enough of talking on my side, let’s jump into the main article.
Step 1: Brush and Oil
          The first and foremost task is to brush your hair to remove any tangles. Then massage the scalp with oil of your choice (for me that is 1 part castor oil mixed with 4 parts coconut oil). Put oil on the rest of your hair obviously. I usually massage for 5-10 minutes or until my hands get tired. It is not advised to brush the hair after oiling, the reason is simple, your hair is super sensitive after oiling. So that leads to more hair fall.
Step 2: Steam
          Obviously no one has the salon-style steaming machines, but we can “jugaad”. So after oiling, dip a towel in warm water, squeeze out the excess water, cover your hair with the towel and leave it for 5-10 minutes. I put a shower cap on the top of it.
Step 3: Hair pack
          After the steam, let your hair breathe for around 10 minutes and then apply the pack. Here is what you’ll need
Ingredient
Quantity
Onion
1 small
Curd
3-4 tbsp.
Aloe vera gel
1 tbsp.
Apple cider vinegar (optional)
1 tbsp.


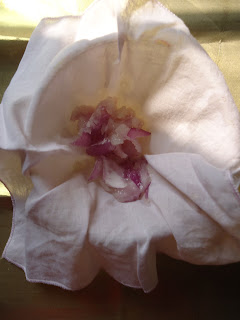
1. Grate the onion and put it into a handkerchief to get its juice. If you got a better option to juice an onion, let me know in the comments below.

2. Add rest of the ingredients to the onion juice, and your pack is ready.
3. Apply this pack all over your hair, focussing more on the scalp, cover your hair with a shower cap. Make sure you leave the pack for atleast 20-30 minutes before you proceed to step 4.
I just happen to have a huge aloe vera plant at my house, so I used the “natural” gel, you can also use the store brought one. Patanjali’s aloe vera gel is great. You can skip the apple cider vinegar (ACV), if you don’t have it at hand. But if you can lay your hands on it, use it, it is going to make your hair softer and shinier. I’ll put a link for buying ACV online, at the end of this post.
Let me quickly tell you (as usual, duh) why the pack works. Curd helps reduce the dandruff and is great for dry and fizzy hair. Aloe vera removes dead cells from the scalp and promotes hair growth. It is also one of the best natural conditioners. ACV removes the build-up from your scalp, and keeps it healthy. It is great for healthy, shiny hair. But the hero of the pack is onion juice, which being rich in sulphur, reduces breakage of hair and thinning. It keeps the scalp healthy and helps the hair to regrow. So this pack is going to work 100%.
Step 4: Wash and condition
          You’ll need good amount of shampoo to wash off all the pack, so use it generously, without going overboard though. And then condition your hair with just a little amount of conditioner, the pack is already conditioning. Let your hair air dry. I have got some more hair care tips for you all, read it here https://ahappygirlwrites.blogspot.com/2014/07/hair-care-tips.html.
So if you try out this routine and if it does wonders for your hair, which I am sure will, let me know in the comments below. If you have any suggestions or if there is anything you want me to write about, feel free to catch up with me here or on Google+ or on Facebook (https://www.facebook.com/AHappyGirlWrites/) or Instagram (https://www.instagram.com/a,happy.girl.writes/) or on Twitter (https://twitter.com/A_Happy_Girl2) or Mirakee (http://www.mirakee.com/ahappygirlwrites) or Tumblr (https://www.tumblr.com/ahappygirlwrites) or on Pinterest (https://in.pinterest.com/happygirlwrites) or on We Heart It (https://weheartit.com/ahappygirlwrites). Until next time, keep smiling and I will be back soon. Don’t forget to have a happy day.
Links to buy ACV:

Sunday, December 24, 2017

Acne Clearing Activated Charcoal Face Pack

Hello beauties. I had ordered an activated charcoal face pack, quiet some time ago and I found that it treated my acne pretty well and it also reduced the spots. It was also travel-friendly so that was a bonus. But I happen to be a beauty on a budget, so I decided to DIY it, with the ingredients I had at hand. I have been using my DIY version since a month and let me just say I’m loving it. So without further ado let’s see how to make it.

Ingredients:
Ingredient
Quantity
Multani mitti (Fuller’s earth)
1 tbsp.
Activated charcoal powder
¼ tsp.
Glycerine
½ tsp.
Rose water
2 ½ tsp.
Aloe vera gel
1 tsp.
Clove oil
2-3 drops

(The links to buy activated charcoal powder, clove oil and the face pack on which I based this post are at the end of this article.)

Procedure:
1. Mix all the dry ingredients in a bowl.
2. Add in the wet ingredients. Adjust the consistency according to your like, by adding more rose water. I like a thick face pack, so the quantity of rose water mentioned is okay with me. Be very careful while adding the clove oil because if by chance you happen to add more than a few drops, your skin might feel a slight burning sensation.

3. Apply it on your face and neck and leave it for 15-20 minutes or until it dries out.
You can store this face pack in an air tight container and it will last well for a month. I have put side by side pictures of the pack I made a month ago and the freshly made one. The difference is just of the consistency, which can be adjusted.
          I’ll just quickly talk about the benefits of the ingredients used in the mask. Activated Charcoal helps in clearing out dirt from your skin, fights acne and helps in achieving flawless complexion. Multani mitti is generally good for skin, makes it softer and healthier. Aloe vera treats acne, makes the skin heal faster and reduces scarring. Glycerine is a great moisturiser and rose water is a magic potion for every skin type. But the star here is clove oil, which treats acne and clears out the scars. The overall verdict is that, this pack is ah-mazing.
          So friends, if you do try this out, let me know how it works for you in the comments below. If you have any suggestions or if there is anything you want me to write about, feel free to catch up with me here or on Google+ or on Facebook (https://www.facebook.com/AHappyGirlWrites/) or Instagram (https://www.instagram.com/a,happy.girl.writes/) or on Twitter (https://twitter.com/A_Happy_Girl2) or Mirakee (http://www.mirakee.com/ahappygirlwrites) or Tumblr (https://www.tumblr.com/ahappygirlwrites) or on Pinterest (https://in.pinterest.com/happygirlwrites) or on We Heart It (https://weheartit.com/ahappygirlwrites). Until next time, keep smiling and I will be back soon. Don’t forget to have a happy day.
Links to buy Activated charcoal powder:
You can find clove oil in any beauty supply stores or medical stores. Here is a link to buy it:
Link for the original face pack (which is great by the way, just expensive)

Sunday, December 17, 2017

“Sanskari Definitions” of the Makeup Products


Hello beautiful ladies. Today I am going to talk you through the “standard” description of each of the makeup products that we all are supposed to use, to look “beautiful”. It is written with a hint of sarcasm, slight bit of exaggeration, mostly irony but whole lot of reality. So read it on and be sanskari.
Alright ladies, let’s begin by priming our face. Primer is used to help the makeup adhere to your face, just like you should adhere to the norms and rules, laid down by the society. After applying it evenly, we move on to the foundation. Use a shade that is at least two shades lighter than your skin tone, that is because “fair is beautiful”. Apply it all over your face, neck and your entire body. The next step is concealer. This is the most important step, it helps you cover your “imperfections” and “flaws”. Conceal it all just as you conceal your aspirations, dreams and everything else. Set everything up with a powder. It will help your makeup “stay in place”.
Next we move on to contouring, which is nothing but achieving the “Kardashianesque” face, that everyone is obsessed with, these days. Being fat is not an option, so contour your nose, your cheeks, you belly, breasts, butt, everything. Just slim it down girl. Then go ahead and apply a blush that will make you look coy, sweet and “pretty girly”. The last step to complete the face makeup is highlighter, which will make your features stand out and shine, unlike you, girl. You aren’t allowed to shine.
We now move on to eyes and lips. First use the eyebrow powder/pencil to define your brows, whatever you do, just don’t let the society arch theirs. Next apply the eyeshadow and no matter how many shades you use, remember to “blend in” everything really well, just like you are always asked to. The next step is eyeliner, wing it out ladies, but never use those wings to fly, because that isn’t allowed. Finish the eye makeup with a coat of mascara, and there you go, you have got pretty looking eyes. Your eyes are supposed to be the window to your soul, but it really doesn’t matter what kind of soul you are, it’s just your outer beauty that matters. The final step is lipstick. Choose a shade that isn’t too “bold” and that would in turn draw “attention” to you, so keep it simple. Also remember to keep the lipstick “within the boundaries” of your lips. And that my dears brings us to the end of the makeup routine. A final word, keep all your products and makeup brushes “clean”, just like your character.

Let me just clarify that I am not against makeup, contrarily I love makeup. I am against the “standards” that we girls are supposed to meet. I believe that everyone is beautiful and unique and fitting into “definitions” isn’t okay with me. I just used the makeup products to make my point. So girls, if you agree with me or if you think I missed to mention some products, let me know in the comments below.  If you have any suggestions or if there is anything you want me to write about, feel free to catch up with me here or on Google+ or on Facebook (https://www.facebook.com/AHappyGirlWrites/) or Instagram (https://www.instagram.com/a,happy.girl.writes/) or on Twitter (https://twitter.com/A_Happy_Girl2) or Mirakee (http://www.mirakee.com/ahappygirlwrites) or Tumblr (https://www.tumblr.com/ahappygirlwritesor on Pinterest (https://in.pinterest.com/happygirlwrites) or on We Heart It (https://weheartit.com/ahappygirlwrites). Until next time, keep smiling and I will be back soon. Don’t forget to have a happy day J.

Sunday, December 03, 2017

Healthy Kiwi Cupcakes

Hello all you happy people. I love kiwis and they remind me of the most amazing birthday I had, with my best friends. So I experimented with kiwis and came up with this recipe. I also made simple frosting using hung curd, but you can skip that and just make the cupcakes. Without further ado, let’s begin.

Ingredients:
Sr. no.
Ingredient
Quantity
1.
Whole wheat flour
3-4 tbsp.
2.
Oat flour
2 tbsp.
3.
Kiwi (pureed)
1 tbsp.
4.
Plain yogurt
2 tbsp.
5.
Honey
1-2 tbsp.
6.
Baking powder
1/4 tbsp.
7.
Baking soda
A pinch
8.
Vanilla essence
3-4 drops
9.
Water
1 ½ tbsp.
For frosting
1.
Hung curd
2 tbsp.
2.
Honey
1-2 tbsp.
3.
Kiwi (pureed)
1-2 tbsp.
 If you don’t have oat flour, just use regular flour.

Procedure:
1. Combine the plain yogurt and water in a mixer.
2. Add baking powder and baking soda to it and mix well. Let it rest for around 5 minutes. You will see that bubbles start appearing, this makes the cupcakes light and fluffy.


3. Add in the kiwi puree, honey and essence.

4. Gently fold the flour into the mixture.


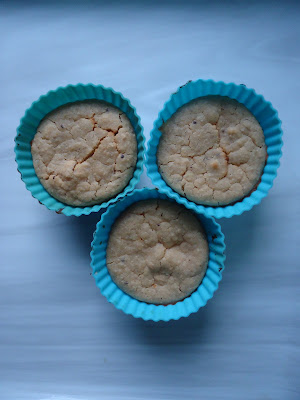
5. Pour the batter into cupcake moulds.
6. Put some kind of ring at the base of the cooker and put the moulds on a plate placed on top. I have already demonstrated how to use cooker for baking in my older posts, you can see it here (https://ahappygirlwrites.blogspot.com/2016/12/eggless-chocolate-cupcakes-in-pressure.html).
7. Put on the lid of the cooker, without the whistle. Let the brownies bake for 10 minutes on high heat.
8. After turning off the heat, let the cooker cool down for 5 more minutes and then take the cupcakes out of the cooker.


For frosting:
To make the hug curd, add around 6-7 tbsp. of yogurt in a cloth, and squeeze out all the water. Tie it up to something, so that gravity can work on it.
1. In a bowl add the hung curd.

2. Add honey and kiwi puree to it.

3. Let this mixture rest in the freeze until the cupcakes cook.
4. You can use a piping bag to frost, but I was too lazy, so I just applied it on with a butter knife. I also added a small kiwi slice on the top. And then the cupcakes are ready to be served.
        I really love the sweet and tangy taste of the kiwis and these are my favourites for this winter. So friends, if you try this out, let me know how you like it, in the comments below. If you have any suggestions or if there is anything you want me to write about, feel free to catch up with me here or on Google+ or on Facebook (https://www.facebook.com/AHappyGirlWrites/) or Instagram (https://www.instagram.com/a,happy.girl.writes/) or on Twitter (https://twitter.com/A_Happy_Girl2) or Mirakee (http://www.mirakee.com/ahappygirlwrites) or Tumblr (https://www.tumblr.com/ahappygirlwritesor on Pinterest (https://in.pinterest.com/happygirlwrites) or on We Heart It (https://weheartit.com/ahappygirlwrites). Until next time, keep smiling and I will be back soon. Don’t forget to have a happy day J.

Sunday, November 26, 2017

Healthy fudgy chocolate brownies

Hello all you happy people. I have been experimenting with ingredients to come up with a recipe for good fudgy brownies and I was finally successful, so sharing with you the same. I used the ingredients that can be found easily in your kitchen (most of them) and made these in a pressure cooker (so that anyone can make those). So without further ado, let’s begin.
Ingredients:
Sr. no.
Ingredient
Quantity
1.
Whole wheat flour
3 tbsp.
2.
Soy flour
2 tbsp.
3.
Cocoa powder
1 tbsp.
4.
Plain yogurt
1 tbsp.
5.
Honey
1 tbsp.
6.
Over ripe banana
1 small
7.
Baking powder
1/2 tbsp.
8.
Water
1 tbsp.

I just happened to have soy flour (made by grinding soy granules/chunks in the mixer). If you don’t have it, just use regular flour.

Procedure:
1. In a large bowl, mash the banana.

2. Add yogurt to it and mix well.

3. Add rest of the ingredients, except water. Add more honey if you like them sweeter.

4. Finally add water ½ tbsp. at a time. You might need more/less water depending on the flour. Just make sure the batter has such a consistency that it falls easily, but is not too watery.

5. Pour the batter into silicone moulds or a tin lined with aluminium foil.

6. Put some kind of ring at the base of the cooker and put the moulds on a plate placed on top. I have already demonstrated how to use cooker for baking in my older posts, you can see it here (https://ahappygirlwrites.blogspot.com/2016/12/eggless-chocolate-cupcakes-in-pressure.html).
7. Put on the lid of the cooker, without the whistle. Let the brownies bake for 12 minutes on high heat.
8. After turning off the heat, let the cooker cool down for 10 more minutes and then take the brownies out of the cooker and then they are ready to be served.


        I used soy flour because it is rich in protein, so if you can find it, make sure to use it. Some people may not agree that banana and honey are exactly “healthy”, but for me they are, they contain natural sugar. I have chocolate cravings every now and then so they are fine with me, I can indulge in brownies without feeling guilty (wink). So friends, if you try this out, let me know how you like it, in the comments below. If you have any suggestions or if there is anything you want me to write about, feel free to catch up with me here or on Google+ or on Facebook (https://www.facebook.com/AHappyGirlWrites/) or Instagram (https://www.instagram.com/a,happy.girl.writes/) or on Twitter (https://twitter.com/A_Happy_Girl2) or Mirakee (http://www.mirakee.com/ahappygirlwrites) or Tumblr (https://www.tumblr.com/ahappygirlwritesor on Pinterest (https://in.pinterest.com/happygirlwrites) or on We Heart It (https://weheartit.com/ahappygirlwrites). Until next time, keep smiling and I will be back soon. Don’t forget to have a happy day J.