Tuesday, August 05, 2014

DIY Coriander Lip Scrub

Hello smiley faces. How are you all doing? Today I am going to share my coriander lip scrub recipe with you all. You people know that that I love to experiment with the things in my kitchen to make some beauty recipes. This scrub is the result of one of such experiments or should I say the very first successful result of my experiments :D
 
Lips are one of the most sensitive parts of our body. Our lips bear everything right from pollution, harsh weather conditions, chemicals in the lip products and not to forget the foods and drinks. Just like your skin, your lips need pampering too. But we usually forget to do so. Exfoliation is important as it helps to remove dead cells or any dirt particles that may have settled onto your lips. There are not many affordable lip scrubs available in India so I decided to make my own version and share it with you all. This scrub will turn your dark, tanned, chapped lips to soft and rosy. Moreover it is made from the ingredients that are easily available in your kitchen so that makes it inexpensive too.
Ingredients:
1. Coriander leaves chopped- 2 tsp
2. Honey- 1 tsp
3. Lemon juice- ½ tsp
4. Rose water- ½ tsp
5. Sugar
6. Mortar and pestle aka traditional spice grinder
Coriander and lemon both contains antioxidants and that is why both of them help to reduce the tanning or darkening of your lips. Honey and rose water nourish your lips and help to restore its natural pink color and make them soft and smooth. Sugar is used for exfoliation.
Procedure:
1. Put the coriander leaves in the grinder and make it into a puree. If your electric blender can grind this little amount of coriander leaves then you can use it. But my blender didn’t blend it so I had to use the mortar and pestle to get my job done. :D
2. Transfer the coriander puree to a bowl.
3. Add lemon juice and rose water to it and mix it well. The mixture looks semi-solid now. But that’s okay we are going to solidify it :D
4. Now add honey to the mixture and mix really well.
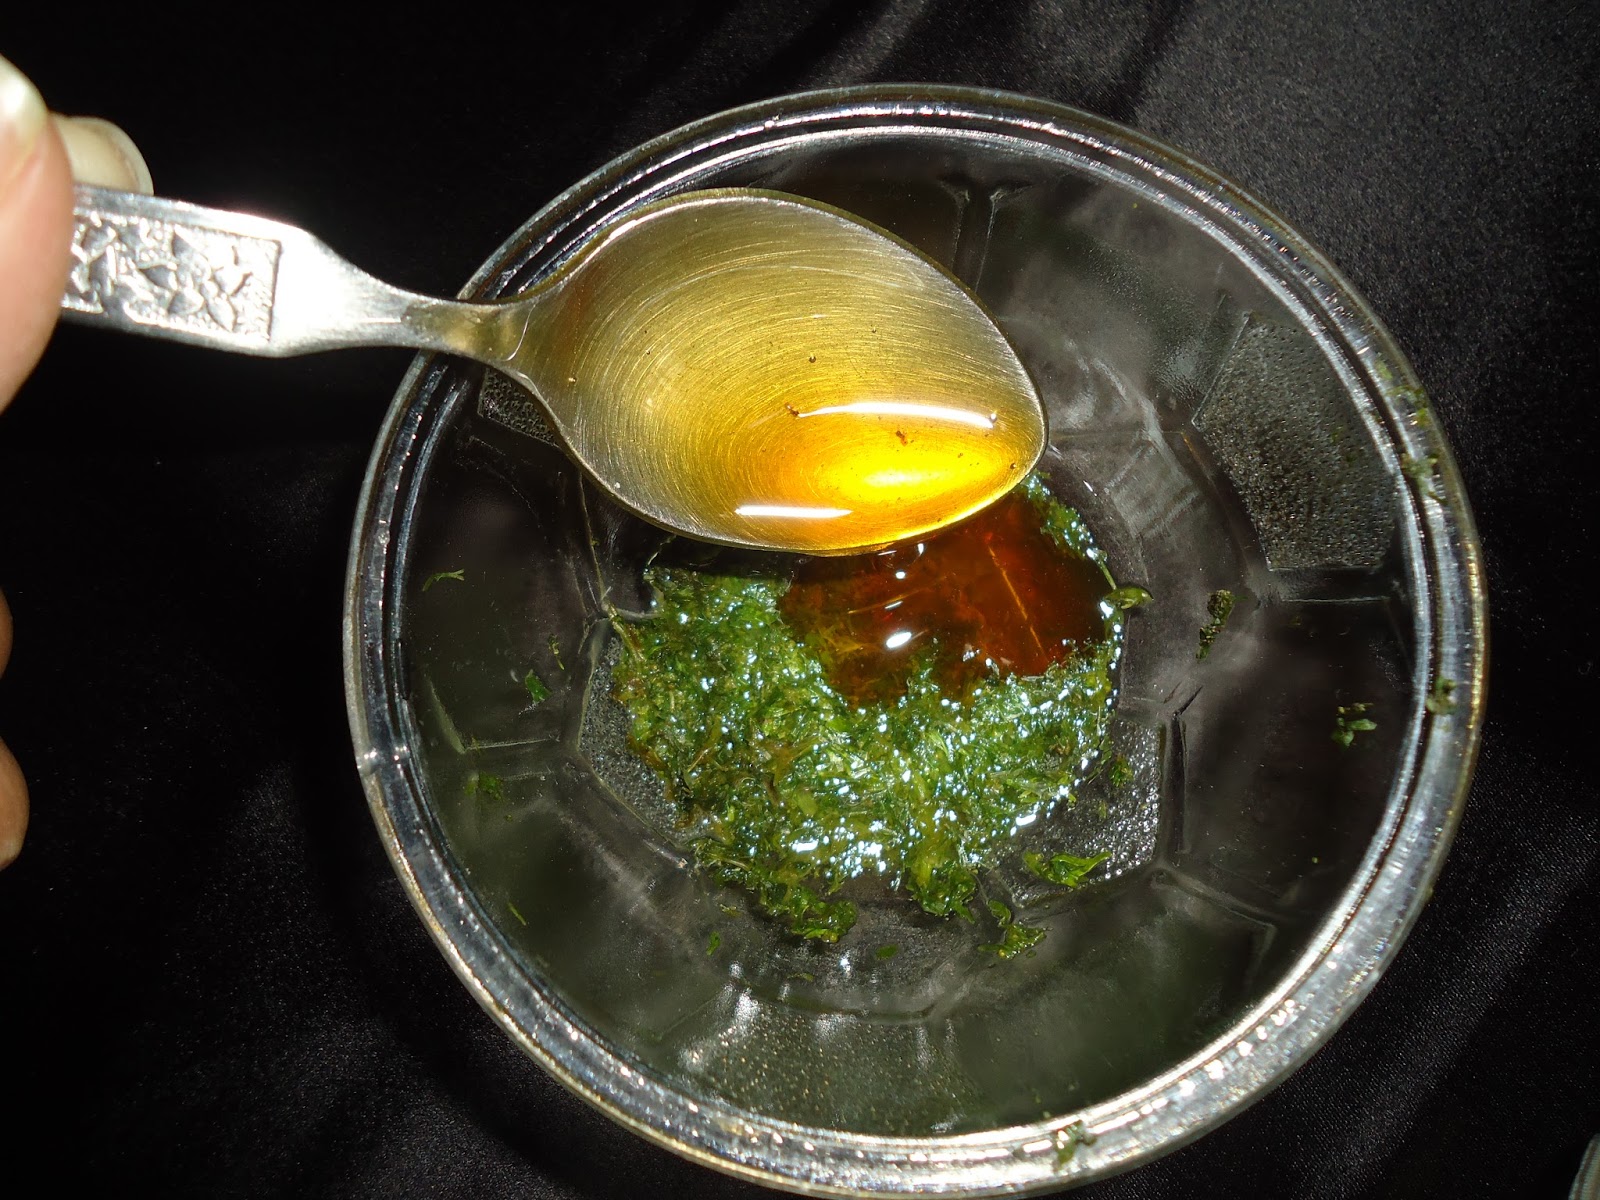
5. Take about ½ tsp of this mixture in another bowl and add ½ tsp of sugar to it (store the rest in refrigerator in a glass bowl for future use). If your sugar has fine granules then you will need to add some more to get a scrub like consistency.
6. Now your scrub is ready. Every time you need to use the scrub, take the mixture made in step 4, add sugar and the scrub is ready to use.
Massage it gently on your lips in circular motion for at least 5 minutes. While doing so, the scrub may get into your mouth but its okay because it is totally edible. Then remove it using lukewarm water. You can also use a towel soaked in lukewarm water for extra exfoliation. Use your regular lip balm after using the scrub. Include this scrub in your everyday night-time routine. This scrub will not only help to lighten your lip color and make your lips soft but it will also help to reduce any pigmentation around your lips. With this proportion of ingredients, the quantity of scrub made would last you for about 4-5 days. I really hope that you like this simple DIY scrub. Do give it a try and let me know it works for your pout :D
Goodbye my dear friends and I will see you soon. Until then Keep Smiling. Please do follow my blog, like the facebook page. (https://www.facebook.com/pages/A-Happy-Girl/292903830872974?ref_type=bookmark) and follow me on twitter (https://twitter.com/A_Happy_Girl2). If you have any suggestions or questions, please comment below.
P.S.: This was the very first article that I wrote so the photos might look little different. But I decided not to re shoot it. The firsts are always special.


Monday, August 04, 2014

Easy D.I.Y Wall-hanging

Hello all you smiley faces. I hope you are having an amazing weekend till now. Today I am going to share with you an easy D.I.Y craft idea. It can be called as a quote wall-hanging. For this craft I decided to use my favourite quote BE HAPPY. This craft is easy as a non-artistic person like me has made it successfully. Let’s get started, shall we?
You will need:
1. Hand-made paper
2. Craft paper (for the words of the quote)
3. Small hanger (you can find this attached to your clothes packaging mostly with pyjamas)
4. Ruler
5. Pen/pencil
6. Scissor
7. Glue
8. Plain paper (translucent)
Procedure:
1. Measure the length of the hanger. Then add 0.2 cm seam on each side i.e. total 0.4 cm seam.
2. Decide the length of the scroll. Make the calculations as shown
3. Cut out the rectangle of the calculated length and width.
4. Mark the lower fold along the length. Fold the paper twice along the lower fold.
5. Secure the folds with strong glue.
6. For the upper fold, fold the paper at 1 cm from the top. Fold the paper along this line.
7. Draw a small rectangle on the 1 cm line as shown. The rectangle should be large enough to fit the loop of the hanger.
8. Cut out the rectangle and slid the hanger through it. Again secure the hanger with glue. You can even use feviquick for this step.
9. Write the quote on the MS office page as shown. Choose a simple font so that it will be easy to cut out the alphabets.  Also the font size should be so selected that the quote will fit perfectly on the handmade paper. I used showcard gothic with font size 85.
10. Hold the paper against the screen and trace the alphabets. O yes it is the simplest way to trace out the alphabets.
11. Cut out the alphabets.
12. Now place the alphabet (reversed) on the craft paper and trace it. The reverse/mirror image trick is to ensure that the pencil/pen marks do not appear on the actual alphabet. 
13. Cut out the alphabets.
14. Now all you need to do is paste the alphabets on the handmade paper. Use the stencil of the cut out alphabets as a guide to stick the alphabets correctly. And viola your wall-hanging is ready. I just added a ribbon bow to make it look little cuter.
So friends I hope you like this easy craft/gift idea. If you give this a try then tell me in the comments. Also you can post a picture of your recreation on my facebook/twitter. By the way what is your favourite quote? Let me know in the comments below. I actually gifted this not so long ago to my bestie and she absolutely loved this simple gift.
Goodbye my dear friends and I will see you soon. Until then Keep Smiling. Please do follow my blog, like the facebook page. (https://www.facebook.com/pages/A-Happy-Girl/292903830872974?ref_type=bookmark) and follow me on twitter (https://twitter.com/A_Happy_Girl2). If you have any suggestions or questions, please comment below.

Friday, August 01, 2014

Healthy Sandwich Pizza

Hello my dear friends. I hope you all are having an amazing day. Today I am going to share with you a very simple and quick healthy snack recipe. It is a cross sandwich made like a pizza. Sounds great right????? Without further ado let’s get started.

Ingredients:
1. 2 Brown or multigrain bread slices
2. ½ cup vegetable toppings of your choice (for me it is simple onions and capsicum topping)
3. ½ tbsp. tomato sauce
4. 1 tsp. soy sauce
5. 1 tsp. butter (nutrallite)
6. ¼ tbsp. oregano
7. Pinch of black pepper
8. ½ cheese cube
9. Salt to taste
10. To be ground into paste
2 medium sized green chillies & 2 cloves of garlic
Procedure:
1. Mix soy sauce, tomato sauce, and 1/3 of the chilli-garlic paste.
2. Add little butter into a non-stick pan.
3. Add the remaining chilli-garlic paste.
4. Add vegetables into the pan. Sauté for 3-4 minutes on medium heat.
5. Add salt, oregano and pepper. Sauté for 5 minutes on medium heat. Remember that the vegetables should not be overcooked.
6. Toast the bread slices in a toaster for 2-3 minutes or just until they are very lightly toasted.
7. Apply butter to the slices.
8. Apply the sauce mixture evenly.
9. Add the vegetable mixture and grated cheese on the bread slices.
10. Put this pizza on the pan, cover it and let it toast nicely for around 5-7 minutes on low heat or until the cheese melts. And then your snack is ready to eat.
So friends this is my go-to healthy recipe whenever I have a strong PIZZA craving. If hope you like this recipe. You can totally customize this recipe to your own taste. If you decide to give this recipe a try, let me know in the comments how you like it.  Also let me know what your favourite pizza toppings are.
Goodbye my dear friends and I will see you soon. Until then Keep Smiling. Please do follow my blog, like the facebook page. (https://www.facebook.com/pages/A-Happy-Girl/292903830872974?ref_type=bookmark) and follow me on twitter (https://twitter.com/A_Happy_Girl2). If you have any suggestions or questions, please comment below.

Monday, July 28, 2014

DIY Friendship Bracelet

Hello my dear friends. I hope you all are having an amazing day. Friendship day is just around the corner so I thought I would share with you easy DIY friendship bracelet. So here we go.
Things you will need:
1. Embroidery threads in 3 colors
2. Scissor
3. Cute button
4. Fabric glue (optional)
Procedure:
1. Wrap the thread around your wrist thrice like shown.
2. Get another thread of same length in same color so that you have two threads of same color.
3. Repeat steps 1 and 2 for remaining two colors.
4. Bring all the threads together & make a knot at the middle of the thread as shown. The loop should be big enough to fit in the button.
5. Attach this to a cardboard or tape it down to a surface.
6. You should have six threads on both sides as shown.
7. Now you have to fishtail braid the threads. For this bring the outer most strand (white) to the middle.
8. Repeat for the other side as well.
9. Repeat steps 7 and 8 for rest of the bracelet. Make sure you keep the order of the colors uniform throughout the bracelet.

10. Once you reach the desired length, tie a knot at the end as shown.
11. Grab 1 or two strands and thread the button through it as shown.
12. Tie a knot to secure the button. It’s better to double knot it.
13. Cut the excess threads and your bracelet is ready. You can put a dot of fabric glue at the knots to secure it well. But my knots are really tight so I didn’t need to do that :D

So friends I hope you like this short and sweet article. If you decide to make this bracelet for your friends, do post a picture on my facebook page. My dear friends, I wish you all a very Happy Friendship Day in advance.
Goodbye my dear friends and I will see you soon. Until then Keep Smiling. Please do follow my blog, like the facebook page. (https://www.facebook.com/pages/A-Happy-Girl/292903830872974?ref_type=bookmark) and follow me on twitter (https://twitter.com/A_Happy_Girl2). If you have any suggestions or questions, please comment below.

Sunday, July 27, 2014

Dear Mr. / Miss Hater……

Hello all you smiley faces. I hope you all are having an amazing weekend. So as the title suggests, this article is going to be about haters. The reason behind writing this article is really special.
Last Sunday I wrote about types of annoying people and on that article I got my very first hate comment. It was by certain Mr. /Miss ANONYMOUS. What he/she wanted to tell me was that I had no skills to become a writer and the whole article was pathetic. Let’s first salute Mr. /Miss HATER for giving his/her extremely frank opinion. But can we just have a moment of silence for the grammar in the comment??? I am pretty sure nobody read that comment because I deleted it as soon as I read it. There were two reasons behind this action of mine. The first one was that the comment was really rude. It could have triggered a war of words on my blog which I wanted to avoid. The second one was it was spreading a negative message about my blog. I mean I am having a really hard time getting people to read my blog and any negativity would have completely spoiled my ambition of becoming a good blogger. The second one was little selfish though.
I was on Gmail when I got the email saying that I have got a new comment on my post. My first reaction was of pure happiness. It was something like “Yayyyy….. I got a new comment…” But when I opened the email and read the comment, the color just drained from my face. My whole body started shaking and this usually happens when I am very angry or hurt. And at that time I was experiencing both feelings together. My next action was to go to my blog and hit the ‘remove content’ button in the comments section. After doing this, it took me few minutes to pull myself together. And then I started thinking about the comment which by the way is still is in my Gmail inbox and it will be there until the end of my blogging journey. I thought why anyone would put a comment like that. There were two reasons that I could think of.
1. That person might be in a very bad mood when he/she came across my article. And then that person realizes that he/she possess one of the qualities that falls under my annoying list.
2. The person has some personal problem with me and wants to cause pain to me.
Any one of these reasons might have led that person to post such a rude comment.
I then went into a deep thinking phase. And then I thought that I thank everyone who likes my blog and appreciates my work. Why shouldn’t I thank this HATER given that he/she did read my blog? Until that time I was getting a little bit of praise and encouragement for my work and then suddenly this comment came in. It’s being in a blissful dream and then suddenly you fall from the bed and are brought back to reality. I had just started to think that I can write (thanks to the love shown by all of you my lovely readers) but this person actually brought me back to the reality that I still need to improve a lot. So such comments would help be humble and grounded forever. I knew that I would face criticism and hate at some point of my blogging journey. I just thought that it came too early. But I am an optimist and such incidents trigger me to perform better. I am like a catapult (गुलेल), the more you pull the string backwards, better are the chances of the object hitting the target perfectly. I do follow this lovely quote from the movie ‘A pursuit of happyness’

The moral is that if anyone hates you or criticizes you or tries to pull you back from your goal, it is okay because HATE SUCCESS. So Mr. /Miss HATER if you are reading this article, all I want to say is thank you for hating my article. You are just helping me to become a better writer. So friends I hope you like this article about my HATE comment experience. If you have any such experience, let me know in the comments below.
Goodbye my dear friends and I will see you soon. Until then Keep Smiling. Please do follow my blog, like the facebook page. (https://www.facebook.com/pages/A-Happy-Girl/292903830872974?ref_type=bookmark) and follow me on twitter (https://twitter.com/A_Happy_Girl2). If you have any suggestions or questions, please comment below.


Friday, July 25, 2014

Rules of Healthy Eating

Hello my healthy friends. I hope you all are having an amazing day till now. Today I am going to share with you some of my healthy eating tips (again). So here we go.
1. The best tip that I can give anyone to be healthy is to eat fresh homemade food. It is the best food ever.
2. Cut down on all the tempting fast foods, mouth watering fried foods as well as sugary delicacies.
3. Ignore all types of caffeinated drinks and sodas (including diet sodas). Instead drink something that actually does something good to your body. This includes green tea, coconut water, green smoothies, etc
4. Eat lots of fruits and vegetables especially the greens (spinach, fenugreek and other varieties of locally available greens)
5. Stock up on whole grains and (fresh) sprouts.
6. Eat healthy snacks like homemade popcorn, khakra made with very little oil, murmura, poha (without potatoes), upma, etc
7. Consume nuts and dry fruits (in moderation).
8. Not being racist but replace all whites with browns. That means say no refined sugar, refined flour (maida) or any food made with that. Instead use whole wheat or multi grain flour. Replace sugar with dates, jiggery, and honey.
9. Drink at least 2.5-3 liters of water every day.
10. Start your day by drinking a tablespoon of lemon juice mixed in half a glass of water. This works as a detoxifier.
11. Always chew your food well. Researchers say that our brain requires 20 minutes to know whether our stomach is full or not. So take your time to finish your food.
12. Instead of having two heavy meals, break them down into 4-6 small meals.
13. Follow a specific time table and eat at specific time intervals throughout the day. If on some days you get hungry in between these intervals, don’t worry eat some healthy snacks or fruits.
14. Even if you are eating healthy food, don’t over eat it.
15. If you really want to be healthy, reduce stress from your life.
                           And lastly I just want to tell you all that it is okay f you aren’t able to follow these rules on some days (Everybody has such days). Only make sure that you follow them for most of the days (say 95%of the days). So here are some rules of healthy eating that I follow. If you think I missed any rule, let me know in the comments section.
   Goodbye my dear friends and I will see you soon. Until then Keep Smiling. Please do follow my blog, like the facebook page. (https://www.facebook.com/pages/A-Happy-Girl/292903830872974?ref_type=bookmark) and follow me on twitter (https://twitter.com/A_Happy_Girl2). If you have any suggestions or questions, please comment below.

Tuesday, July 22, 2014

Hair Care Tips

Hey smiley faces. I hope you all are doing great. Today I am going to share with you some of my hair care tips. The most important hair care tip is BE GENTLE with your hair. If you treat your hair well, it’s going to stay with you or else it will leave you. So here are my tips in 5 steps.
1. Brushing:
Tip 1 - You should brush your hair at least twice or thrice a day.
Tip 2 – Never brush your hair when it is wet.
Tip 3 – Always use a wide toothed comb/ brush.
Tip 4 – Always brush your hair before taking a shower.
Tip 5 – Always brush your hair from the tips to roots.
2. Oiling:
Tip 1 – Oil your hair at least twice a week. Its always better to oil your hair night before you take a head bath.
Tip 2 – Remember that oil is the food for your hair.
Tip 3 – Section your hair into 2 or 4 parts and then apply oil to your hair.
 Tip 4 – Take a little amount of oil on your finger tips and then gently massage it into your roots. 
Tip 5 – Make sure that you brush your hair after oiling to distribute the oil evenly.
3. Washing:
Tip 1 – Use mild shampoo and conditioner.
Tip 2 – Mix little amount of water with the shampoo to make its application easy. Apply shampoo from roots to tips.
Tip 3 – Apply conditioner from mid length of your hair and work your way towards the tips.
Tip 4 – Apply conditioner, leave it for few minutes and then rinse it off. This just makes your hair look beautiful.
Tip 5 – Do not wash your hair more than twice a week. And use cold/lukewarm water to wash it
4. Drying:
Tip 1 – Always use a soft towel to dry your hair.
Tip 2 – Just after you have finished rinsing off the conditioner, twist your hair lightly, sandwich it in between your palms and remove excess water from it.
Tip 3 – Next wrap your hair in a towel just like so. Let your hair sit like that for a few minutes and then you can repeat tip no. 3. Only now use your towel to sandwich your hair. Don’t rub the towel vigorously against your hair.
Tip 4 – Avoid putting your hair into a turban.
Tip 5 – Let your hair air dry. Use dryer only when it’s absolutely necessary.
5. Styling:
Tip 1 – Try to avoid heat to style your hair.
Tip 2 – Do not wear tight hairstyles for too long. 
Tip 3 – Also don’t wear high ponytails or buns for a long time.
Tip 4 – Let your hair be free of any rubber bands or hairstyles atleast for some time every day.
Tip 5 – And last but not least get your trimmed to keep split ends at bay.
And the most important tip is to maintain a healthy lifestyle for healthy hair. So friends these are some of my hair care tips. These tips have helped me to recover from extreme hair fall that I went through last year. I hope you find it helpful too. This article was requested by my very dear friend. So I thank her for pushing me into writing this article :D . If you have any hair care tips that you would like to share with me and all my lovely readers, please leave them in the comments below.
Goodbye my dear friends and I will see you on soon. Until then Keep Smiling. Please do follow my blog, like the facebook page. (https://www.facebook.com/pages/A-Happy-Girl/292903830872974?ref_type=bookmark) and follow me on twitter (https://twitter.com/A_Happy_Girl2). If you have any suggestions or questions, please comment below.